|
Type: Indicates the field type of the added form tool. The value here cannot be changed.
Name (Field Name): The name of the component is written. It will be created automatically but can be changed.
Help Text: It is the text entered for the explanation to appear when the mouse is hovered over the form tool.
Height: Determines the height of the report component in the form. Write in px, ie.: 300
Width: Determines the width of the report component on the form. Write in px, ie.: 300.
From Left / Top: Determines the left and top position of the component.
 |
The Width and From Left / Top properties are only valid for forms of the Free Form type. In responsive usage, the component will automatically use the appropriate width and position.
|
SQL Query: Five different arguments are needed to be supplied to embed Power BI reports in your forms. These are:
- Application Id
- Report Id
- Workspace Id
- Application Secret
- Tenant Id
You can provide these values either by returning a constant value from your SQL query or by reading from the database. Do not forget that Application Secret information must be kept securely. You can provide data to the SQL query field as follows.
select '98cf3121-1332-4b35-ba73-081ff1a69ffx','AppId'
union
select 'e3e5270d-b531-4aa6-9542-322bd2111c12','WorkspaceId'
union
select '1072542e-d9b7-5617-acef-dddfce330557c','ReportId'
union
select 'b8Sjh2X~NTSCBX-Wxybp6cRGQVyf5QVkoPNB9CSKC','AppSecret'
union
select '65b7cb2f-c294-55fc-c04c-bc79c95c97e3','Tenant'
Note that the field names are AppId, WorkspaceId, ReportId, AppSecret and Tenant.The order of the data is not important.
|
There is no action usage in the Power BI element!
|
Guide to Finding Power BI Embed IDs and App Secrets
This document explains step-by-step where to find the five basic IDs and app secrets required to embed your Power BI reports into your own app.
1. App ID and Tenant ID
AppId is the unique identity of your application in Azure. TenantId is the unique ID of your organization (tenant) in Azure Active Directory (now Microsoft Entra ID).
1. Sign in to the Azure Portal:
- In your browser, navigate to portal.azure.com.
- Sign in with the Azure account from which you accessed your Power BI reports.
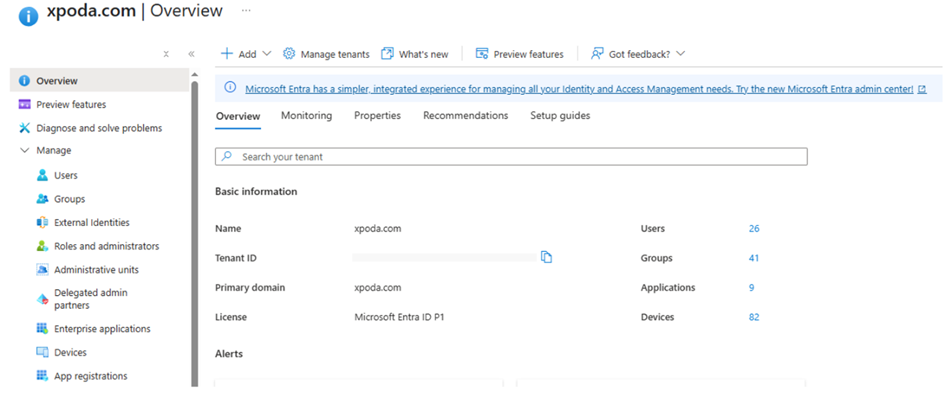
2. Go to Microsoft Entra ID:
- Find and click "Microsoft Entra ID" in the left menu. (If you cannot find it, use the search bar.)
3. Find App ID:
- On the Microsoft Entra ID overview page, click "App registrations" in the left menu.
- Find the name of your application (Xpoda Power BI or your project-specific name) in the list and click on it.
- On the overview page that opens, copy the value next to the label "Application (client) ID". This is your AppId.

In addition to the above section
- You can check your application permissions by switching to the Manage Api Permissions tab on the application screen above. If there is no permission on this screen, the necessary read authorizations must be given.
You can add the necessary permissions by following the steps below.
- Go to Microsoft Entra ID > App registrations > Your application.
- Click "API permissions" from the left menu.
- Click on "+ Add a permission" button, select "Power BI Service".
- Select the "Application permissions" tab.
- Report.Read.All
o What it does: Grants permission to read all reports in Power BI. This is required for your application to view a report.
o Why it matters: It is the most basic permission for embedding your reports.
o What it does: Grants permission to read all datasets in Power BI.
o Why it matters: Reports are often associated with datasets, and access to basic dataset information may be required for the report to load correctly.
o What it does: Allows you to read all dashboards in Power BI.
o Why it matters: You will need this permission if you plan to embed Power BI dashboards in your application. It is not required only for reports, but is often added for general access.
o What it does: Grants permission to read all content in Power BI (reports, dashboards, datasets, datastreams, workspaces, etc.).
o Why it is important: This is a broader permission that encompasses the Report.Read.All, Dataset.Read.All, Dashboard.Read.All permissions above. It is generally preferred to provide read-only access to all Power BI content.
- Check the permissions mentioned above and click the "Add permissions" button.
-
MOST IMPORTANT: If "Not Granted" is written next to the permissions you have added to the list, be sure to click the "Grant admin consent for" button. Make sure that the status of the permissions changes to "Granted".
- You may need to add User.Read permissions based on the context of your application by selecting Microsoft Graph other than Power BI Service.
o If your application has additional functionality besides Power BI embedding functionality, such as showing users their profile information, changing their personal settings in Power BI, or interacting with other Microsoft 365 services (such as Outlook, OneDrive), then User.Read or other Microsoft Graph permissions may be required.
1. Finding Tenant ID:
- Go back to the Microsoft Entra ID main overview page (you can use your browser's back button or click "Microsoft Entra ID" again in the left menu).
- On the overview page, copy the value next to the label "Tenant ID". This is your TenantId.
2. App Secret (App Secret/Value)
App Secret is the secret key your app uses to authenticate to Power BI APIs. This value is only visible at the time of creation and should be copied with care.
1. Navigate to your App Registration in Azure Portal:
- As you did in the previous step, log in to the Azure Portal and follow the path Microsoft Entra ID > App registrations > Your application (Xpoda Power BI).
2. Go to Certificates & secrets:
- From the left menu of your application registration, click on "Certificates & secrets".
3. Create a New Client Secret:
In the image below, there is an active secret. If this secret is expired in the application list, it will appear “Expired”. You should create a new secret from the steps below by clicking on the application name that appears in this way. A new secret must be created in the same way in the application created for the first time.
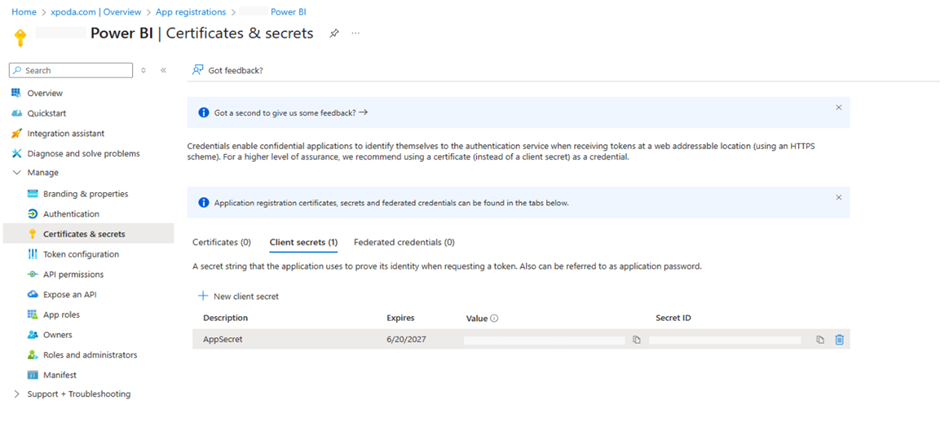
- Under the "Client secrets" tab, click on the "+ New client secret" button.
- In the window that opens, enter a description for your secret (e.g. "PowerBI Embed Secret") and select a validity period (e.g. "24 months").
- Click on the "Add" button.
- Copy Secret Value:
- Immediately after the secret is created, copy the value that appears in full text in the "Value" column. This is your AppSecret.
-
IMPORTANT: If you do not copy this value now, you will not see it again after you leave this page and you will need to create a new secret. Paste the copied value into your project's configuration file or somewhere safe.

3. Workspace ID and Report ID
WorkspaceId is the ID of the workspace where your Power BI reports are located. ReportId is the ID of a specific Power BI report.
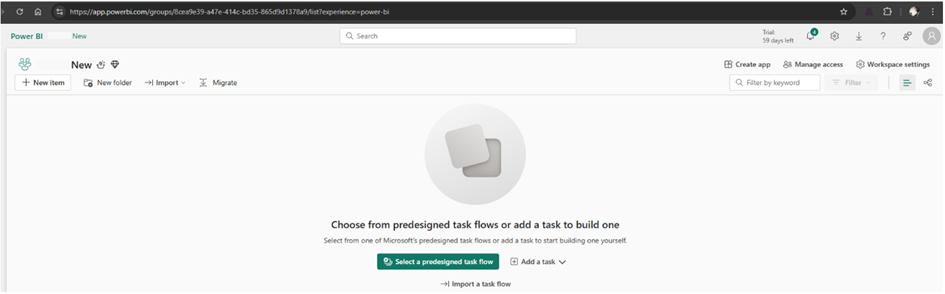
1. Log in to the Power BI Service:
- Go to app.powerbi.com in your browser and sign in with your Power BI account.
2. Go to Your Workspace:
- Click "Workspaces" in the left menu.
- Click the name of the workspace where your report is located (for example, "Xpoda Demo Reports" or whatever you named it for your project) and enter it.
3. Find the Workspace ID:
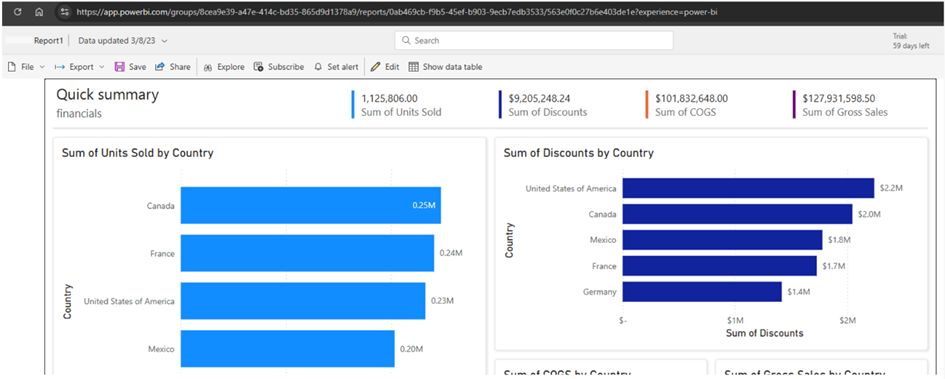
- Once in the workspace, look for the URL in the address bar of your browser. The URL will be in the following format: https://app.powerbi.com/groups/{WorkspaceId}/...
- Copy the part after the word /groups/ up to the / sign. This is your WorkspaceId.
1. Open Your Report:
- From the list of reports in your workspace, click on the name of the report you want to embed to open it.
NOTE: If you have an authorization problem in viewing the report, you can check the workspace authorizations as follows.
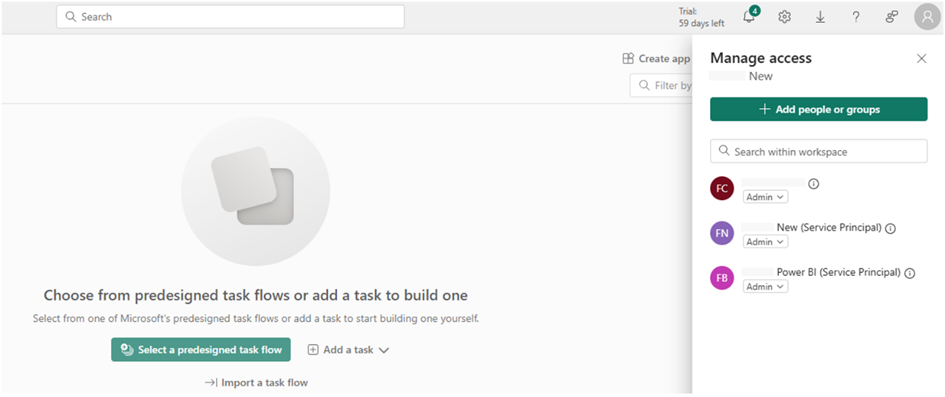
Grant Workspace Permission to Your Application (Service Principal):
- While in the workspace, click three point menu (...) next to the workspace name.
- Select "Manage workspace access" from the options that open.
- In the window that opens, click the "Add people or groups" button.
- In the search box, type the name of your application that you registered in Azure (Xpoda Power BI Web App or your given name). Your app should appear as a Service Principal object.
- Select your app and assign it a role. The "Viewer" role is sufficient to view reports only.
- Click on the "Add" button.
1. Finding Report ID:
You can use Microsoft's documentation for additional adjustments.
Embed Power BI report in a Power BI embedded analytics application for your customers - Power BI | Microsoft Learn
Embed Power BI content in an embedded analytics application with service principal and an application secret - Power BI | Microsoft Learn
This document will help you step by step to find all the credentials needed to integrate your Power BI reports into your application. Make sure to get these credentials correctly and add them to your application's configuration files.
|