Micro Integration can be designed with 2 different methods and its integration can be performed with 3 different methods.
Integration Design Methods:
- Mapping with Form Fields: Form fields are completed with Mapping.
- Mapping According to Query Result: The SQL Query is prepared and the mapping is completed with the tool.
Integration Run Methods:
- During Form Registration: At the time the form is saved.
- Post-Confirmation Integration with Flow: It will be done automatically from the world after deregistration approvals or future checks.
- Integration by Selecting from the List Report: After saving the form, one travels in a List tool and travels with the help of a button.
Meaning:
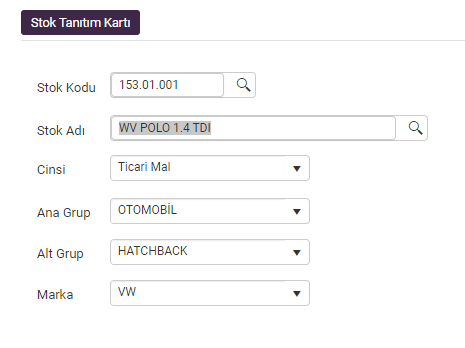
This section describes the settings in which the micro country will occur in plans for a card stock design.
We make our stock card on it. Stock codes and paths are entered manually, the Type part is designed from the options that can be defined in the section box, and our other selections will be brought from the main information in the micro.
Design screenshot:
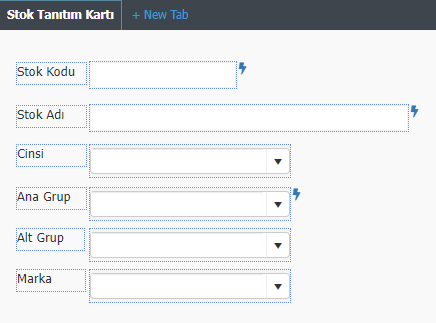
After making our form settings, we click on the Integration menu in the Main Page.

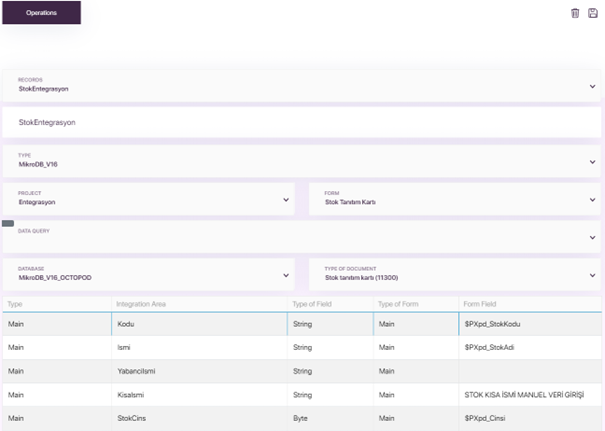
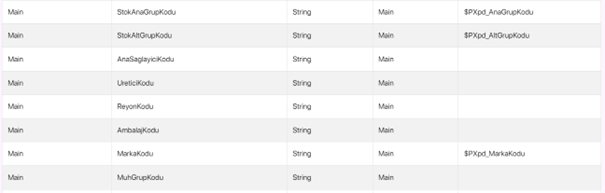
After defining a name for the Stock integration from the settings section that opens, we fill in the necessary selection fields. From the mapping field, we match the fields of our form with the appropriate fields in the STOCKS table. By manually entering data in some fields we want, we ensure that standard information is integrated without taking it from the form.
Note: While designing the form, you should make the field types and dimensions of the fields to be integrated the same as the types and dimensions in the table you will integrate. Likewise, it should be noted that the sizes and types are appropriate so that you do not get errors during the integration of the data that you will transfer manually (the data entered in the manual mapping table). For example, if you try to send a string data to a Float or int type field, your integration will not work.


After completing our integration settings, we save it with the record button in the upper right corner. Our record is created in the XPODA_INTEGRATIONS table. Each new integration we make will create a new record in the relevant table. Now we add our integrationid information into our form and activate our integration feature for the integration work after registration.
We check the XPODA_INTEGRATIONS table and learn our id and add it as SELECT 1 to the Integration ID Query field.
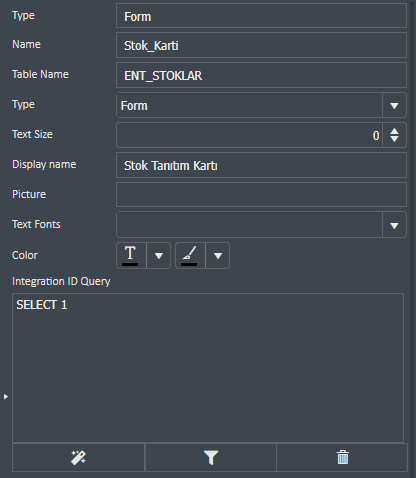
The integration we just created is saved in the XPODA_INTEGRATIONS table. We write SELECT 1 because the value of this record in the IntegrationID field is 1.
Finally, we activate the Integration feature from the form properties to ensure instant integration after registration.

Performing the integration process after approval with the flow: It is used for the integration process to be done after the approval process in the regulated flow. Whichever form page is selected from the Document field in the flow, the integration in that form page will work.
You can view the example usage on the link below.
https://docs.xpoda.com/hc/en/articles/360011676579-Integration
Integration by Selecting from List Report:
It is the action to be taken for the desired line through the list on the form page. In order to perform this operation, UserTableID, FormTypeID and ProjectID values must be present in the List query.
The action to be used for this is the Run Linked Integration action.
Below is an example of the action.
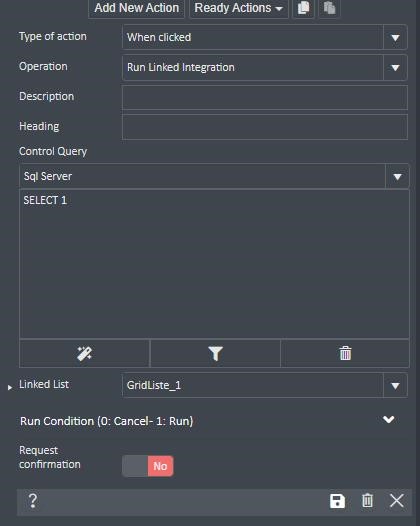
From the Linked List field, the list to be processed is selected on the form page
FREQUENTLY ASKED QUESTIONS
Can I use information other than form fields in the integration?
Yes, for example, if your form's Series information is not variable for an order integration, you do not need to keep Series information in the Form fields. During mapping, the desired serial information can be written as the default value in the Serial field. Also, in the integration method with Query, you can manually add the Serial information into your query and use this information during mapping. With Query, you can get the information you need from different tables or use it in mapping by making the calculations you want in your query.
After the integration, what kind of a connection does the micron have with the Xpoda Form table?
After the integration, the RecNo information or Guid information generated on the micro side (this information changes according to the Micro version) is automatically written into the IntegrationID field that is automatically created in your form fields. You can map the UserTableID information created in your own form to a different field that is suitable during integration, and thus you can match the double-sided ID information.
Can it integrate multiple documents at the same time?
Yes, it can be done, but for this, you need to trigger a procedure that you will write with the Show Content (query) action of xpod or the DB Query object in the flow. The procedure should be written in the ability to determine all the documents to be integrated as a result of the parameter it will receive, and to perform your integration process for all the results.
Can a form be integrated into more than one table?
A form can be integrated into as many different tables as desired after the appropriate conditions are met. In order to do this, you must first create more than one integration mapping for a form. For each mapping created, one record will come to the XPODA_INTEGRATIONS table. You must conditionally write the IDs of the records created in this table into the Integration ID Query field in the form properties. For example, you can automatically save the information you enter according to a type you choose from the form, either as a domestic order or as a waybill according to the type you choose.